
Labels turn dead bugs into specimens. There are many ways to make them, but it's easier than ever with the tools we have today. I've experimented with styles over the years and have settled on a template that works well for my pinned collection. Here's how I use it and other files to label my collection.
At one point in the old days printed labels either had to be ordered from a company or made by hand with a printing press, if not hand written. It was a pain, and people found ways of making the best of it. However, this often created less precise labels out of necessity. This brevity entrenched practices in label design that leaves a lot to be desired. We don't have to leave room for handwriting dates and distances or wait for mailed off templates to be shrunk, or any of that stuff. We can get GPS coordinates, print as small as 3.5pt, and make as many as we want with the press of a button.
Printing
For pinned specimens I use heavy cardstock, at least 65lb but higher is better. A decent laser printer is usually good enough such as one for office use. These could be used for alcohol specimens too but this has risks. A hand written label in something indelible would be more stable than toner. The melted plastic can be rubbed off easier than pigment absorbed in paper. The absolute best would probably be synthetic paper with a thermal printer, that way no toner is involved at all. But that gets expensive quickly, unfortunately. In any case, turning the label outward when putting it in the vial gives it the best chances of not being rubbed blank while maximizing visibility.
Locality Labels
There are as many fonts, date and coordinate formats, and kinds of data that can be used on labels as there are collectors. The generally accepted format begins with the country and gets more specific through each administrative level with a maximum of five lines being the recommended max. The country, state/province, county, distance to nearest landmark, and a brief location form the locality at it's most basic. Ultimately GPS coordinates, microhabitat, collecting method, and plant/animal associations should also be included. Dates should be day to year, not the American format, and use either roman numerals in lower case for the month or just abbreviating it. Under some circumstances 3.Aug.2024 might print better than 3.viii.2024 so use your best judgment. Also, all my measurements are in metric because that's what 95% of the world uses and I'm on board with that.
First label:
COUNTRY: STATE County
Nearest town
More specific locality
Date, Collector
Second label:
Lat°, Long°
Elevation, Collecting method
Other info, fieldnumber
First label:
USA: NV Lyon Co.
19km sse. Wellington
Toiyabi NF Road 338
5km w. Lucky Boy Rd.
3.Sept.2020 J. Doe
Second label:
30.12345°, -111.12345°
1600m sweeping Artemisia
1130-1230PST JAD246
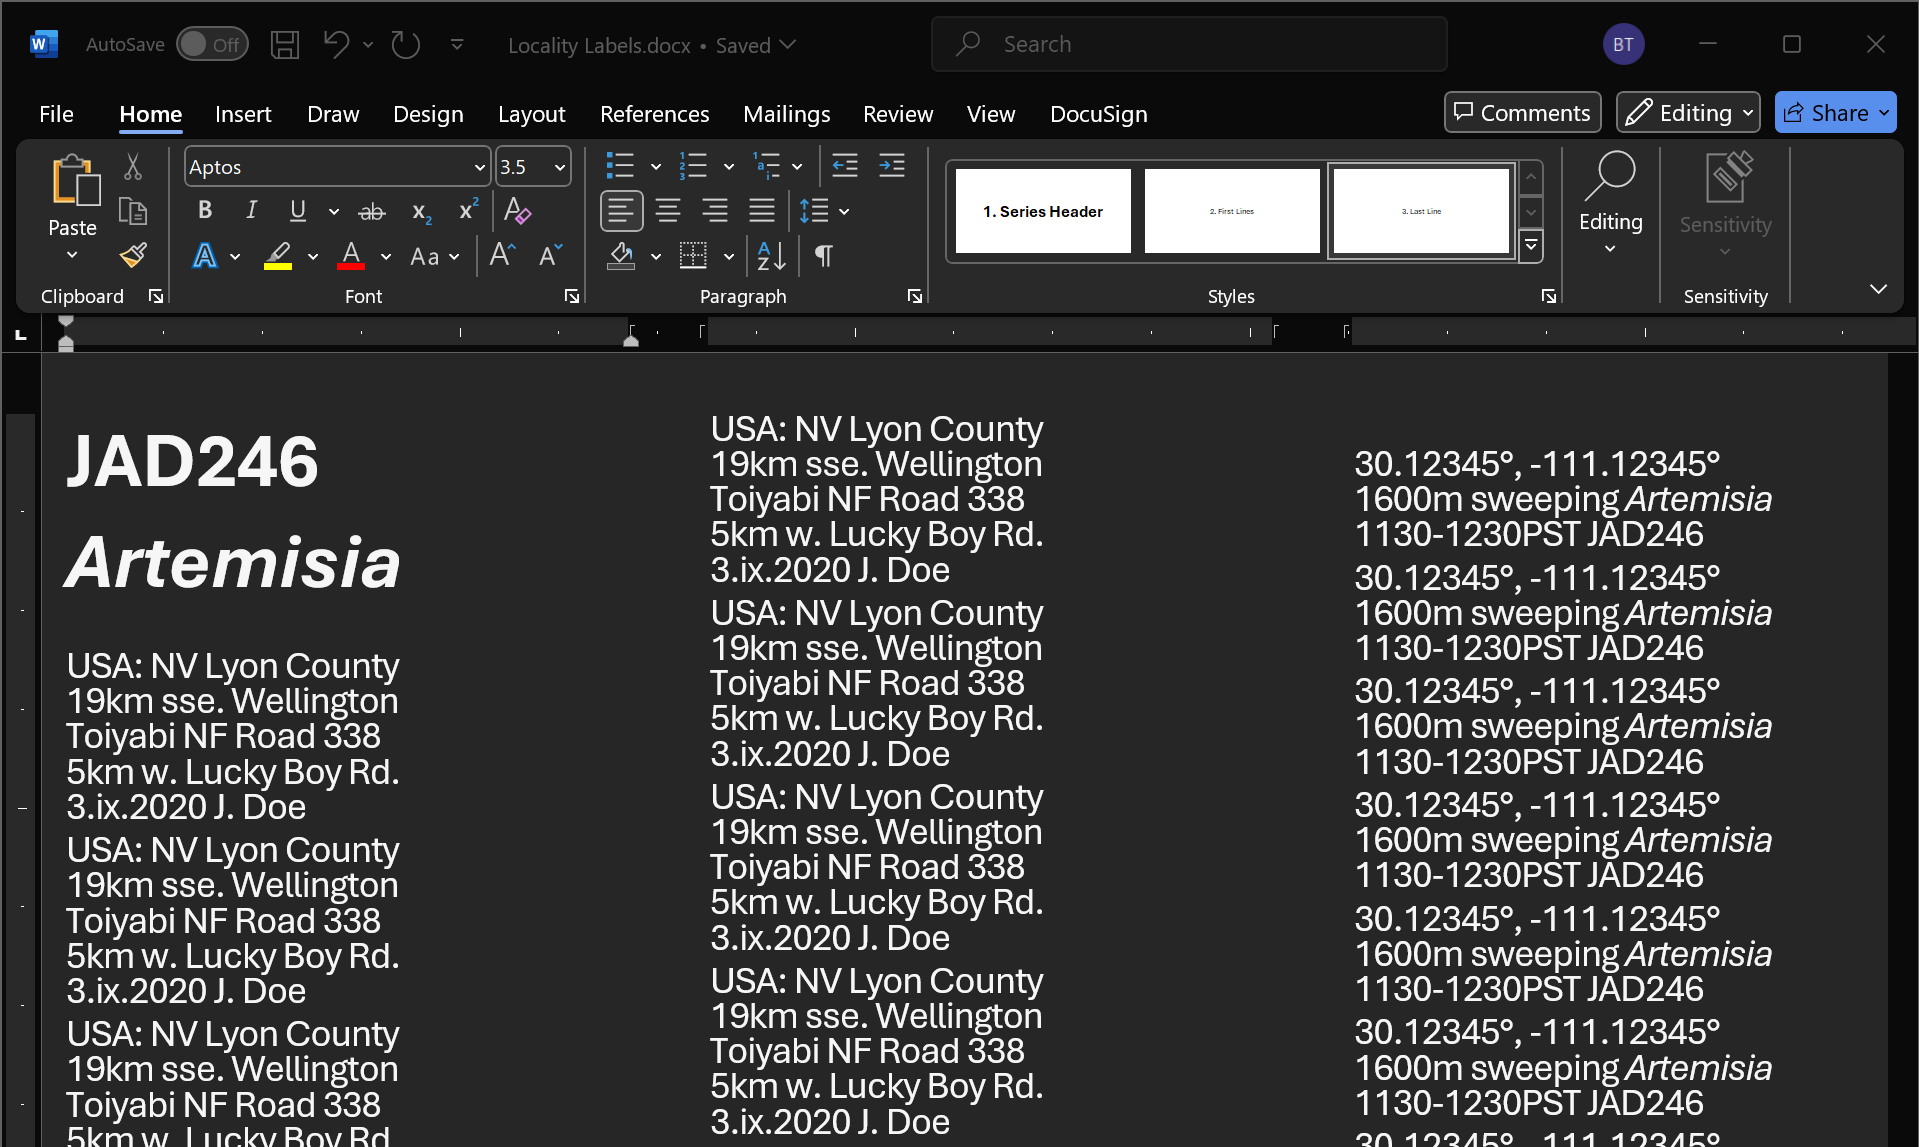
This is where I fall back on my fieldnotes to fill out that second label. I always have the coordinates, elevation, fieldnumber, and other details here. Why two labels and all that extra stuff? Although space in my collection is limited and a large label wastes it, I also need to report all the info I can about how I found this thing. My notes won't always be around to explain these specimens and I can't expect anyone to bother looking them up. Plus, these are nice details to know at a glance and some can help with identification. The majority of my pinned specimens are about the size of that label so it works well for me. Here's a copy of my template:
(Also works in LibreOffice)
Feel free to download and try it out and edit if you want. It's really not crazy complicated, but a little weird at first. Use the three custom styles to create a nice gap between labels to cut through. The first lines use the "first lines" style, and the last line uses the, you guessed it, "last line" style. It has some weird typography setting changed to create a little gap underneath it to make cutting labels apart easier.
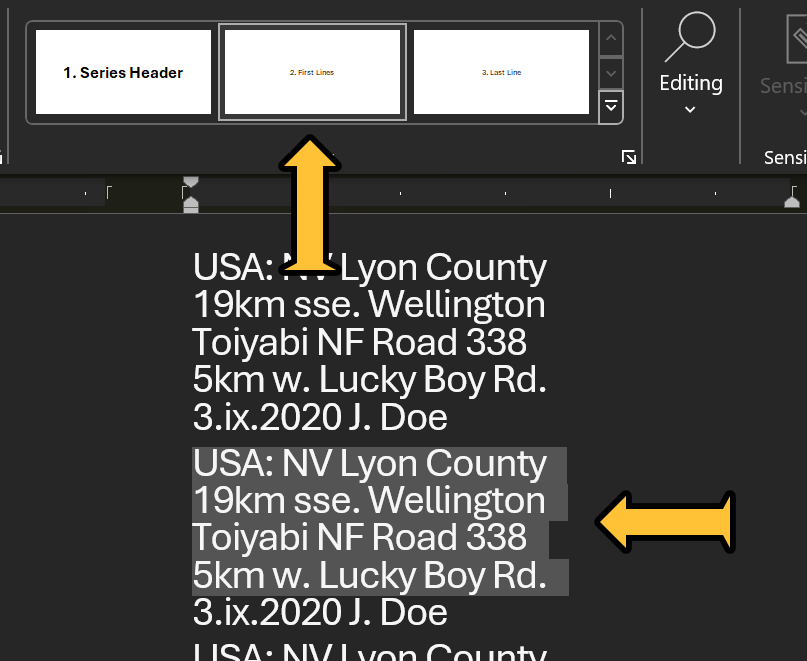

See that gap on the bottom? It's great for scissors between labels. On the right are the normally spaced lines for the rest of the label.
One thing I learned helps me is to save each batch of labels separately with filenames by fieldnumber for when I miscount and need more later. There are almost always some tucked away papered specimens I didn't count when typing up labels.
Determination Labels

Another template I have is for determination labels. Print as-is for handwriting determinations, but it's easily edited for large batches of whatever is needed. This makes a whole lot of det labels so you can drop the year off the inserted text to make them last longer.
(Also works in LibreOffice)
Here's a nice summary of Open Nomenclature, which is worth a read if you haven't seen it or similar articles already. In short, it's a collection of terms for indicating things like identification uncertainty in very specific ways. These are very useful for decoding other peoples' labels and writing your own.
